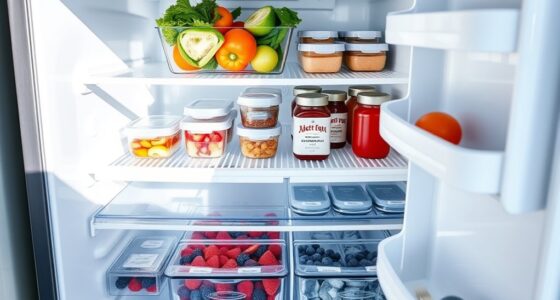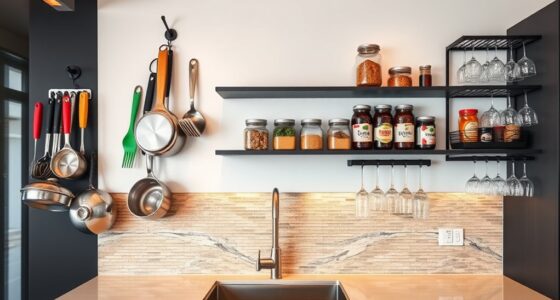
Set up an automatic food storage container, pack it with suitable food, and check that its lid and automatic feature work correctly. This guide is for first-time users and covers countertop or rechargeable containers that remove air, seal automatically, or monitor storage conditions. Allow 15–30 minutes for setup and your first use; the exact controls and care instructions vary by model.

Get home appliances delivered free with Prime
- Fast, free delivery on millions of items
- Prime Video, Amazon Music and more included
- Member-only deals all year

1.3 L Automatic Vacuum Coffee Canister with LED Display
- ✔ Capacity: 1.3 L / 18 oz
- ✔ Dimensions: 4.92 × 4.92 × 7.28 in
- ✔ Materials: Borosilicate glass and BPA-free, food-grade materials

Electric Vacuum Coffee Canister with LED Display, 2.0 L
- ✔ Capacity: 2.0 L / 22 oz
- ✔ Dimensions: 4.92 × 4.92 × 9.76 in
- ✔ Materials: Borosilicate glass and BPA-free food-grade materials

Wall-Mounted Rice and Dry Food Dispenser
- ✔ Brand: RCJCQSR
- ✔ Material: PP
- ✔ Dimensions: 36.6 × 32.4 × 38 cm
Difficulty: Beginner | Time: 15–30 minutes for setup and the first use
What You’ll Need
Tools & Materials:
- Automatic food storage container and its lid
- Manufacturer’s instructions and charging cable or batteries, if required
- Clean, dry food and a clean preparation surface
- Food-safe cloth or sponge for cleaning
Knowledge:
- Basic food hygiene, including handwashing and keeping raw foods separate from ready-to-eat foods
- How to identify whether food needs refrigeration or freezing
Read the container’s instructions before washing or powering it. Check whether the body, lid, gasket, and any electronic parts have different cleaning rules. An automatic seal does not make perishable food shelf-stable or replace refrigeration.
1.3 L Automatic Vacuum Coffee Canister with LED Display
For buyers who want an automatic container primarily for coffee, this 1.3 L rechargeable vacuum canister is the most balanced pick in our lineup. It automatically seals the contents, monitors pressure, and can restore the vacuum when pressure drops below the stated threshold. That ongoing maintenance is a more active storage approach than the wall dispenser, which makes food easy to portion but is not described as protecting it from air.The LED display reports vacuum status, storage dates, and battery level, so we can check key information without opening the lid. A glass window offers another way to see what is inside. Compared with the 2.0 L model, the 1.3 L capacity is the better match when a smaller amount of coffee and a more compact container are priorities. Its tradeoff is straightforward: buyers storing larger quantities may prefer the taller, higher-capacity canister instead.We should also account for the daily upkeep. The container is hand wash only, and its automatic functions require charging; a 2000 mAh battery and USB-C cable are included. The stated standby time and sealing time describe the product’s specifications, but actual convenience still depends on keeping the canister charged. This pick makes sense for a coffee-focused routine that values visible status and automatic vacuum maintenance over dishwasher-safe cleaning.
Pros:
- Automatically seals and replenishes the vacuum when pressure falls.
- LED display shows vacuum status, storage dates, and battery level.
- Glass window lets us check the contents without opening the lid.
- USB-C rechargeable battery avoids disposable batteries.
Cons:
- Hand-wash-only care takes more effort than dishwasher-safe storage.
- Charging is required to use the electric vacuum and display features.
- Its 1.3 L capacity is smaller than the 2.0 L canister in this comparison.
Best for: Coffee drinkers who want automatic vacuum maintenance and status information in a relatively compact canister.
Not ideal for: Households that need a large-capacity container, dishwasher-safe cleanup, or storage without a rechargeable appliance.
Bottom line: We recommend this as the most balanced coffee canister for buyers who want automatic vacuum upkeep without choosing the lineup’s largest format.
“We recommend this as the most balanced coffee canister for buyers who want automatic vacuum upkeep without choosing the lineup’s largest format.”
Electric Vacuum Coffee Canister with LED Display, 2.0 L
When the smaller canister’s capacity feels limiting, this 2.0 L electric vacuum canister gives us more room while keeping the same core storage idea. It automatically vacuums its contents, monitors pressure, and replenishes the seal when pressure drops. Like the 1.3 L model, it has an LED display for vacuum status, dates, and battery level, plus a glass window for checking contents without lifting the lid.The choice between these two canisters is mainly about how much coffee we want on hand. This model has a greater stated capacity and is taller, so it is better suited to a larger supply when vertical counter or cupboard space is available. The 1.3 L canister is the more compact option for a smaller routine. Neither canister is a multi-compartment dry-food organizer, so buyers wanting separate portions of grains or beans should look at the wall dispenser instead.Its automatic features bring the same practical limitation as its smaller counterpart: the vacuum and display rely on a charged battery. The listed battery capacity is 2000 mAh, and USB-C charging takes 3–4 hours. That is a manageable routine for buyers who want to store more in one container, but less appealing if we want a passive container with no charging to track. The supplied details do not specify care instructions, so we should check the product’s instructions before choosing a cleaning method.
Pros:
- 2.0 L stated capacity exceeds the 1.3 L canister’s capacity.
- Automatically vacuums and replenishes the seal when pressure drops.
- LED display tracks vacuum status, storage dates, and battery level.
- Glass window allows a contents check without opening the container.
Cons:
- Requires 3–4 hours to recharge via USB-C.
- Vacuum and display features require a charged battery.
- Its taller form may be harder to place than the 1.3 L model.
Best for: Coffee drinkers who want more stated capacity than the 1.3 L model and have room for a taller canister.
Not ideal for: Buyers with limited vertical storage, those who want a multi-food dispenser, or anyone avoiding battery-powered storage.
Bottom line: We choose this over the 1.3 L canister when extra capacity matters more than a shorter, more compact format.
“We choose this over the 1.3 L canister when extra capacity matters more than a shorter, more compact format.”
Wall-Mounted Rice and Dry Food Dispenser
This wall-mounted dispenser serves a different purpose from both vacuum canisters: it is designed to keep six kinds of small dry food organized and ready to portion. Pressing the dispenser releases food, while adjustable dividers let us change the size of compartments. Its transparent body makes it easier to see what needs refilling, and the removable top cover provides access when adding more.Compared with the 1.3 L and 2.0 L coffee canisters, this is the lineup’s choice for variety and quick access rather than automatic air protection. The canisters monitor pressure and replenish a vacuum; this dispenser does not have a stated vacuum feature. That makes it a more natural fit for rice, millet, barley, mung beans, and red beans that we want close at hand, rather than for buyers focused on keeping coffee sealed.The food limits matter before we commit to a spot on the wall. The description says it is not suitable for larger items such as cashews or soybeans, so the six compartments do not make it a universal dry-food solution. Wall mounting also calls for a suitable location and installation. In return, it avoids charging and gives us several visible compartments in one unit. Choose it for portioning and organization; choose either vacuum canister when preserving coffee or other pantry staples from air exposure is the priority.
Pros:
- Six compartments keep different small dry foods separated.
- Adjustable dividers allow compartment sizes to be changed.
- Transparent body makes contents easy to check.
- Removable top cover simplifies refilling.
Cons:
- Not suitable for larger foods such as cashews or soybeans.
- No vacuum sealing or pressure monitoring is specified.
- Manual measurements may vary by 1–3 cm.
Best for: Households that want to organize and portion several kinds of small grains or beans from a wall-mounted unit.
Not ideal for: Coffee buyers seeking vacuum storage, people storing large beans or nuts, or households without a suitable mounting location.
Bottom line: We recommend this dispenser for accessible, multi-food organization, but the vacuum canisters are better suited to coffee preservation.
“We recommend this dispenser for accessible, multi-food organization, but the vacuum canisters are better suited to coffee preservation.”
As an Amazon Associate we earn from qualifying purchases.
Before You Start
Wash your hands and inspect the container, lid, seal, and any valve for cracks, residue, or loose parts. Clean removable parts only as the manufacturer allows, then dry them fully. Place the container on a stable, dry surface near an outlet if it needs charging. Keep liquids away from charging ports and controls. Plan to refrigerate or freeze perishable food promptly, even if the container removes air or displays a freshness indicator.
Step-by-Step Instructions
Step 1: Check the instructions and controls
Find the model’s setup, cleaning, and food-storage instructions. Identify the power switch or button, sealing control, release valve, indicator lights, and any temperature or date display. Check whether the automatic mode starts when you close the lid or requires a button press.
Tip:Controls differ by model. Do not guess at a setting if the manual describes a specific sequence.
Check: You can identify how to power the unit, start and release a seal, and tell when the cycle is complete.
Step 2: Charge or power the unit
Charge the container or install the specified batteries if your model requires power. Keep the charging port and cord dry, and use only the power source listed by the manufacturer. If it is a plug-in model, place it where the cord will not pull or snag the container.
Tip:Let a rechargeable unit reach the recommended charge before its first sealing cycle. Avoid operating it while connected to power unless the instructions allow it.
Check: The power indicator shows that the unit is ready, or the controls respond as described in the manual.
Step 3: Prepare and portion the food
Choose food that suits the container and its intended storage method. Divide food into portions you can use without repeatedly opening the container. Let hot food cool as food-safety guidance recommends before sealing, and pat wet ingredients dry when excess moisture could interfere with the seal.
Tip:Do not use a vacuum-style container for foods that can be crushed, foam, or release liquid into the mechanism unless the maker approves it. Leave the headspace specified for your model.
Check: The food is portioned, at a suitable temperature for packing, and does not obstruct the lid or sealing area.
Step 4: Load the container
Place the food inside without filling above the marked line or the limit in the manual. Keep crumbs, oil, and food particles off the rim, gasket, valve, and sensor. Arrange soft items so the lid will not press them flat, and keep any liquid below the stated fill limit.
Tip:A clean, unobstructed rim helps the lid seal. Wipe the rim with a clean cloth if food touches it.
Check: The lid can sit flat, the gasket is clear, and the contents remain below the fill limit.
Step 5: Fit the lid and start automatic sealing
Align the lid with the container and press or latch it as directed. Select the automatic sealing mode, or close the lid to start the cycle if your model works that way. Keep hands, hair, and loose items away from moving parts while the unit runs.
Tip:Do not force a latch or hold down a button unless the instructions call for it. Stop the cycle if the unit makes an unusual noise, leaks, or displays an error.
Check: The cycle finishes and the indicator, sound, or display signals completion. The lid remains seated without visible gaps.
Step 6: Check the seal and label the food
Check the lid and seal all around for gaps. Use the manual’s specified test, such as gently lifting the container by its lid only if that test is approved. Mark the contents and the date packed, then transfer perishable food to the refrigerator or freezer within the appropriate food-safety timeframe.
Tip:Never rely on a vacuum indicator or date display alone to judge whether food is safe to eat. Follow safe storage times and temperatures for the food.
Check: The seal passes the model’s check, and the container has a clear contents and date label.
Step 7: Open and clean after use
Release the seal using the valve or release control before lifting the lid. Remove food with clean utensils, then wash and dry the parts according to the manufacturer’s directions. Keep electronic components and charging ports out of water unless the instructions explicitly rate them for washing.
Tip:Do not pull hard on a sealed lid; releasing pressure first helps prevent spills and damage.
Check: The lid opens without force, and the cleaned container is dry, free of food residue, and ready for storage or reuse.
Common Mistakes to Avoid
- Filling past the maximum line or letting food touch the gasket. — Leave the headspace stated in the manual and wipe the rim and seal before closing the lid.
- Assuming automatic sealing preserves perishable food at room temperature. — Follow normal refrigeration or freezing guidance for the food, regardless of the container’s features.
- Washing the electronic lid or immersing the charging port. — Check the care instructions for each part and wipe electronics with the method the manufacturer permits.
Troubleshooting
Problem: The container will not start or the indicator stays off.
Solution: Check the charge or batteries, confirm the lid is aligned, and make sure the controls are dry. Follow the manual’s reset or startup sequence; stop if the unit remains unresponsive.
Problem: The seal does not hold or the unit keeps running.
Solution: Release the lid, inspect the gasket and rim for crumbs, moisture, or damage, and reseat the lid. Confirm you are using the correct mode and that the container is not overfilled.
Problem: The lid is difficult to open.
Solution: Use the release valve or button and wait for pressure to equalize. Do not pry the lid or pull the gasket out with a sharp tool.
Problem: Liquid or food residue enters the valve or mechanism.
Solution: Stop the cycle and unplug the unit if safe to do so. Clean only removable parts as directed, dry them fully, and contact the manufacturer if liquid reached a non-washable electronic section.
What Success Looks Like
The container completes its cycle, the lid sits evenly, and the seal passes the manufacturer’s check. Food is labeled and stored at the correct temperature, while the container’s controls and electronics remain dry and clean. At the next opening, the release control works and the lid comes off without force.
Next Steps
Store the empty container with its lid clean and dry, following the manufacturer’s advice about whether to leave the lid attached. Recharge it when the indicator or manual recommends. Before each use, inspect the gasket and valve; replace worn parts with approved replacements. If the unit repeatedly fails to seal or shows an error after the manual’s basic fixes, stop using it and contact the manufacturer with the model number and error code.
Frequently Asked Questions
Can I store any food in an automatic food storage container?
No. Check the model’s approved uses. Avoid foods that crush easily, foam, or release liquid into a vacuum mechanism unless the manufacturer says they are suitable. Keep perishable food refrigerated or frozen as required.
Do I need to let hot food cool before sealing it?
Follow food-safety guidance and the container instructions. Do not seal hot food if it could create pressure, damage the container, or warm other refrigerated food. Divide large portions into shallow containers to cool safely.
How do I know whether the container has sealed properly?
Use the indicator and seal check described in the manual. Look for an evenly seated lid with no gaps. Do not use a generic lifting test unless the manufacturer recommends it.
Can I put the container in a microwave or dishwasher?
Only if the manufacturer marks that specific container or part as microwave-safe or dishwasher-safe. Electronic lids, batteries, valves, and gaskets may need separate handling.
How often should I replace the gasket?
Inspect it before use and replace it when it is cracked, stretched, sticky, or no longer seals after cleaning and correct fitting. Use a replacement specified for your model.