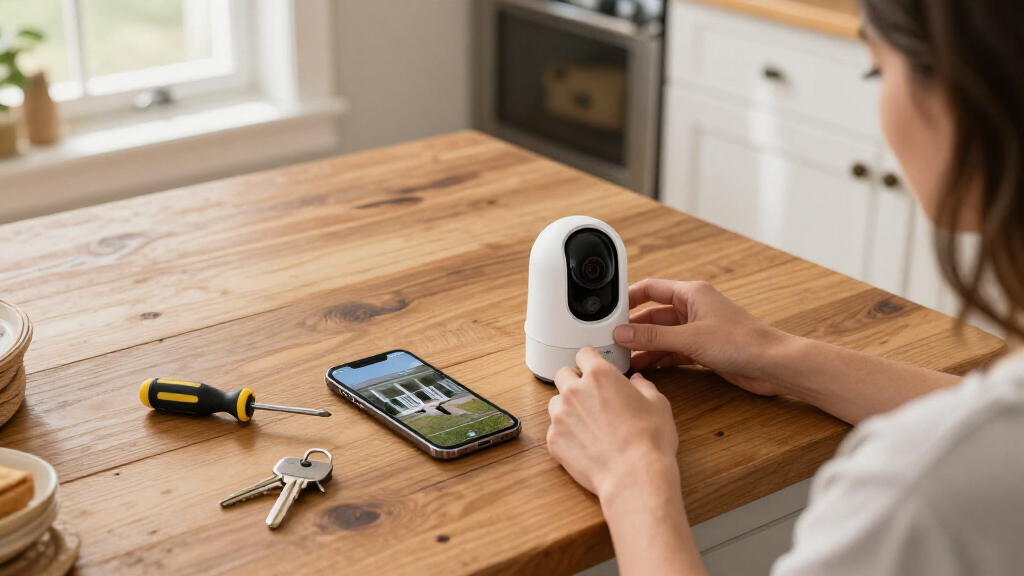

This guide helps homeowners and renters install and configure smart home security cameras, connect them to a phone or home network, and check that live view, alerts, and recording work. It suits beginners who can use a smartphone and follow basic device instructions. Allow 1-3 hours for one or more cameras; installation time varies by camera type, network strength, and whether you need to run power or mount hardware.

Get home appliances delivered free with Prime
- Fast, free delivery on millions of items
- Prime Video, Amazon Music and more included
- Member-only deals all year

Blink Outdoor 4 and Wired Doorbell 2K+ — 3 Cameras + Doorbell (Black)
- ✔ Outdoor cameras included: 3 Outdoor 4 cameras
- ✔ Outdoor video: 1080p HD, up to 30 fps
- ✔ Outdoor field of view: 143° diagonal
Blink Outdoor 4 and Wired Doorbell 2K+ — 5 Cameras + Doorbell (Black)
- ✔ Outdoor cameras included: 5 Outdoor 4 cameras
- ✔ Outdoor video: 1080p HD, up to 30 fps
- ✔ Outdoor field of view: 143° diagonal
Blink Outdoor 4 & Wired Doorbell 2K+ Kit with Sync Module Core — 2 Cameras + Doorbell (Black)
- ✔ Outdoor cameras included: 2 Outdoor 4 cameras
- ✔ Outdoor video: 1080p HD
- ✔ Outdoor field of view: 143° diagonal
By the end, each camera should cover a useful area without creating avoidable privacy or network problems. You will also know how to verify its settings and what to check if setup fails.
Difficulty: Beginner | Time: 1-3 hours
What You’ll Need
Tools & Materials:
- Smartphone or tablet with the camera maker’s app
- Smart home security camera and any included mounting hardware
- Wi-Fi network name and password, if using a Wi-Fi camera
- Power outlet or charged battery, as required by the camera
- Drill, screwdriver, and suitable wall anchors if mounting on a hard surface
- Ladder or step stool for elevated locations
Knowledge:
- Basic smartphone and app use
- Ability to access your home router settings or identify your Wi-Fi network
- Basic familiarity with using a drill if a permanent mount is required
Check the camera’s instructions for supported Wi-Fi bands, operating temperature, weather rating, power requirements, and storage options. Many cameras require 2.4 GHz Wi-Fi during setup, even if your router also has 5 GHz. Ask your landlord or property manager before drilling. Follow local rules and avoid recording private areas beyond your property, such as a neighbor’s windows.
Blink Outdoor 4 and Wired Doorbell 2K+ — 3 Cameras + Doorbell (Black)
For many homes, three outdoor cameras plus a 2K doorbell is the most practical balance in this lineup. It gives us enough cameras to assign separate views to the front approach, driveway, and another vulnerable exterior area, without committing to the five-camera kit’s larger installation footprint. The shared 2K wired doorbell is the resolution standout for visitors and deliveries; the Outdoor 4 units are 1080p, so we should not assume the outdoor views match the doorbell’s detail.Setup is flexible because the Outdoor 4 cameras run on two AA lithium batteries apiece rather than requiring power cables at each mounting point. The listed battery life is up to two years under default settings, but frequent events, settings, and weather can change that. The doorbell is different: it needs compatible existing wiring for power. Compared with the two-camera kit, this bundle extends coverage to another outdoor zone; compared with the five-camera kit, it avoids adding cameras that may be unnecessary for a smaller property.The main compromise is the service model. Person and vehicle detection and cloud video features require a separate plan, and the system uses 2.4 GHz Wi-Fi. Buyers who expect comprehensive smart detection without an ongoing plan, or who need higher-resolution views at every outdoor position, should consider another system. For a typical home that wants a doorbell view and a few battery-powered exterior cameras, however, this is the clearest all-around fit.
Pros:
- Three outdoor cameras provide broader coverage than the two-camera kit without the five-camera set’s extra units.
- The doorbell records 2K video with a 140-degree horizontal and vertical field of view.
- Outdoor cameras use two AA lithium batteries each, allowing placement without a nearby power outlet.
- Includes the Sync Module Core, two-way audio, app access, and Alexa compatibility.
Cons:
- Person and vehicle detection and continued cloud video storage require a separate plan.
- Outdoor cameras record in 1080p rather than the doorbell’s 2K resolution.
- The doorbell requires compatible wiring, and the system connects on 2.4 GHz Wi-Fi.
Best for: Households that want to monitor a front door, driveway, and one additional exterior area with battery-powered cameras.
Not ideal for: Buyers who need subscription-free person and vehicle detection, wired outdoor cameras, or 2K resolution from every camera.
Bottom line: We recommend the three-camera bundle as the best-balanced choice for homes needing meaningful exterior coverage without excess cameras.
“We recommend the three-camera bundle as the best-balanced choice for homes needing meaningful exterior coverage without excess cameras.”
Blink Outdoor 4 and Wired Doorbell 2K+ — 5 Cameras + Doorbell (Black)
When the challenge is not just seeing the front door but keeping watch across several sides of a property, the five-camera bundle is the logical step up. With five battery-powered Outdoor 4 units and the same 2K wired doorbell found in the smaller kits, it can cover more entrances, paths, or outbuildings without changing platforms. Its advantage is camera quantity, not a higher outdoor video specification: every Outdoor 4 still records 1080p, while the doorbell carries the 2K resolution.Compared with the three-camera bundle, this set suits homes with more distinct areas to monitor, such as multiple exterior doors or a long perimeter. That extra coverage only helps if the cameras have suitable mounting positions and dependable Wi-Fi signal. Each camera needs two AA lithium batteries, so a larger deployment also means more cells to manage over time, even with the stated up-to-two-year life under default settings. The weather-resistant design and listed operating range make the cameras usable outdoors, but placement and exposure still matter.We would skip the extra units if the home only has a couple of important approaches: the three-camera kit covers that kind of use with less hardware to install and maintain. As with the other bundles, advanced detection and cloud storage are tied to a separate Blink plan. This is the strongest choice for coverage breadth, not for buyers seeking different recording quality, local-first storage assurances, or a subscription-free feature set.
Pros:
- Five Outdoor 4 cameras provide the broadest outdoor coverage among these three kits.
- The 2K doorbell adds a detailed front-door view alongside the 1080p outdoor cameras.
- Battery-powered cameras can be mounted where running power cables would be inconvenient.
- Includes a Sync Module Core, two-way audio, and Alexa compatibility.
Cons:
- More cameras mean more mounting decisions and more batteries to monitor than the smaller bundles.
- Outdoor 4 video remains 1080p; the larger kit does not improve image resolution.
- Person and vehicle detection and cloud video storage require a separate Blink plan.
Best for: Owners of larger homes or properties with multiple exterior entrances and separate areas that need camera coverage.
Not ideal for: Smaller homes with only one or two priority outdoor zones, or buyers unwilling to manage batteries and optional plan requirements.
Bottom line: We’d choose this kit for a property with five genuinely useful outdoor camera positions, rather than buying extra coverage for its own sake.
“We’d choose this kit for a property with five genuinely useful outdoor camera positions, rather than buying extra coverage for its own sake.”
Blink Outdoor 4 & Wired Doorbell 2K+ Kit with Sync Module Core — 2 Cameras + Doorbell (Black)
The two-camera kit makes sense when we want front-door monitoring plus one additional outdoor view, rather than a camera at every side of the home. It includes the same 2K wired doorbell and 1080p Outdoor 4 camera design as the larger bundles, so choosing the smaller set does not mean stepping down in camera resolution or smart-home compatibility. The difference is simply that there are fewer Outdoor 4 units to position.Compared with the three-camera bundle, this option is easier to keep focused: one camera might watch a driveway or rear entrance while the doorbell covers arrivals and deliveries. It also means fewer batteries to maintain, since each Outdoor 4 uses two AA lithium cells. The advertised battery life can reach up to two years under default settings, but actual results depend on activity and environmental factors. The cameras connect over 2.4 GHz Wi-Fi, so a strong signal where each unit is mounted remains important.This is not the right shortcut for a property with multiple blind spots. In that case, the three-camera kit provides a more useful spread, and the five-camera kit is better suited to wider grounds. We should also factor in the shared limitations: the doorbell needs compatible wiring, and person or vehicle detection and cloud video capabilities require a separate plan. The smaller kit is a straightforward way to cover two priority outdoor zones, not a substitute for a larger, more feature-independent security installation.
Pros:
- Includes the same 2K doorbell and 1080p Outdoor 4 hardware as the larger bundles.
- Two outdoor cameras can cover the most important exterior zones without unused extra units.
- Battery-powered installation avoids running power to each outdoor camera.
- Comes with Sync Module Core, app-based live view, two-way audio, and Alexa compatibility.
Cons:
- Only two outdoor cameras may leave blind spots around homes with multiple approaches.
- The doorbell requires compatible existing wiring.
- Advanced person and vehicle detection and cloud video storage require a separate plan.
Best for: Apartment or smaller-home owners who need a doorbell camera and two outdoor views, with a simple camera count to manage.
Not ideal for: Large properties, homes with several entrances or detached structures, or anyone who needs subscription-free advanced detection.
Bottom line: We’d pick the two-camera kit for a compact home or focused setup, but move up to three cameras if a third exterior area needs coverage.
“We’d pick the two-camera kit for a compact home or focused setup, but move up to three cameras if a third exterior area needs coverage.”
As an Amazon Associate we earn from qualifying purchases.
Before You Start
Decide what you need each camera to see before attaching it. Mark likely entry points, such as doors, driveways, and ground-floor windows, then plan views that avoid public or neighboring private spaces where possible. A camera records what is in its field of view, so test the view from the intended position before drilling.
Use only the power supply and mounting parts approved for the camera. Do not work from an unstable ladder or drill near wiring, plumbing, or gas lines. If you cannot identify what is behind a wall, choose another mount point or ask a qualified installer. For battery cameras, charge the battery before setup if the instructions call for it.
Step-by-Step Instructions
Step 1: Choose camera locations
Walk around your home and select a location for each camera based on the area you want to monitor. Place indoor cameras where they can see an entryway or shared room without pointing into bathrooms, bedrooms, or areas where household members expect privacy. For outdoor cameras, prioritize entrances and approach paths. Keep the camera within the manufacturer’s stated Wi-Fi range and within reach of its power source.
Check for glare from windows, direct sunlight, and obstructions such as plants or roof edges. If the camera has night vision, avoid aiming it through glass: infrared light often reflects off the pane and obscures the image. Consider whether visitors, household members, or delivery workers will be recorded and use visible placement or notices where appropriate.
Tip: A higher position can make a camera harder to reach, but a very high angle may show the tops of heads rather than faces. Aim for a useful view of faces and approach routes.
Check: You have a planned position for each camera, with a clear view of the intended area and no obvious privacy, power, or Wi-Fi conflict.
Step 2: Check the view before mounting
Power on the camera temporarily and use the app’s live view, if available, to test the intended position. Move it a little at a time until the view includes the area you want while excluding unnecessary neighboring spaces. Walk through the area at different distances and check whether faces, doors, or other key details are visible.
Test in daylight and, if practical, after dark. Check for reflections, motion from trees or passing traffic, and bright lights that may wash out the image. If the camera cannot be placed where it has both a useful view and a reliable signal, choose a different location before drilling.
Tip: Do not rely only on the app’s positioning graphic. Confirm the real camera image and check the view from the intended mounting height.
Check: The live image shows the intended area clearly, and movement through the area is visible without capturing more than needed.
Step 3: Install the camera and mount
Follow the camera maker’s mounting instructions. For a wall or ceiling mount, hold the bracket in place, mark the screw holes, and check that the location is safe to drill. Use anchors suited to the wall material, attach the bracket firmly, and then secure the camera. For a temporary or renter-friendly setup, use only a mounting method approved for the camera and surface.
For outdoor installations, use a camera rated for the expected weather and mount it where rain cannot collect around connections. Keep plugs and adapters dry, and use outdoor-rated electrical equipment where needed. Do not leave a power cable pinched, stretched, or exposed where it could be damaged. Adjust the lens only after the camera is attached.
Tip: If a camera uses a battery, confirm that the battery can be removed for charging after installation. Avoid mounting it where you cannot reach it safely.
Check: The camera is firmly supported, its cable or battery is accessible as intended, and the lens can be adjusted toward the planned view.
Step 4: Install the app and create a secure account
Download the manufacturer’s official app from your phone’s app store. Check the publisher name before installing, then create an account or sign in. Use a unique password that you do not use for email or other services. Turn on multi-factor authentication if the service offers it, and save recovery codes in a secure place.
Review the app’s permission requests. Allow the permissions needed for setup and features you plan to use, such as notifications or local network access. You can review permissions later in your phone settings. Do not share your account password with other household members; use the app’s household-sharing feature where available.
Tip: Keep your phone’s operating system and the camera app up to date. Avoid scanning setup codes or installing apps from links sent by unknown sources.
Check: You can sign in to the official app, and account security settings are available for review.
Step 5: Connect the camera to the app and Wi-Fi
Plug in the camera or install its charged battery, then follow the app’s add-device instructions. Scan the camera’s QR code or enter its setup code only through the official app. When prompted, connect it to the home Wi-Fi network supported by the camera. Enter the network name and password carefully; if setup fails, check whether the camera requires 2.4 GHz rather than 5 GHz.
Keep the phone near the camera and router during pairing. If the app asks to connect the phone temporarily to the camera’s own network, follow the on-screen instructions and return to the app afterward. Do not reset the camera unless the app directs you to do so or the maker’s instructions recommend it for a specific error.
Tip: A guest network, captive portal, or enterprise login page may prevent some cameras from connecting. Check the camera’s network requirements before changing router security settings.
Check: The app lists the camera as online and can display a live image without repeated connection errors.
Step 6: Set recording, motion, and notification options
Open the camera’s settings and choose the recording method you want, such as a memory card, a compatible hub, or a subscription service. Check what events are recorded, how long clips are retained, and whether footage is stored locally or in the cloud. If you use a memory card, use a card type and capacity supported by the camera.
Set motion zones to cover the relevant approach or entry area rather than the whole image. Adjust sensitivity so normal activity does not create a flood of alerts. Choose when notifications should arrive and whether the camera should record continuously or only when it detects events. Check privacy controls, including any recording schedule, microphone setting, or camera-off mode. Tell household members how the system records and who can view the footage.
Tip: Start with moderate motion sensitivity and narrow zones. You can refine them after observing real alerts rather than trying to tune every setting at once.
Check: The selected recording method is active, motion alerts are enabled as intended, and privacy or schedule settings match how the home is used.
Step 7: Secure the camera and account settings
Open the app’s security or account settings and confirm that multi-factor authentication is enabled if available. Review the list of signed-in devices and remove any you do not recognize. Share camera access only with trusted people, assigning the least access they need. Change any default password if the camera or its hub has a separate login.
Review the camera’s firmware and app update settings. Install available updates through the official app, and allow automatic updates if the manufacturer supports them and the option suits your setup. Do not expose the camera to the public internet through router port forwarding unless the maker’s instructions specifically require it and you understand the security implications.
Tip: Use a strong, unique router password and update router firmware as well. Camera security depends partly on the home network it uses.
Check: Only expected people and devices have access, account protection is enabled, and the camera is running supported software.
Step 8: Test the complete setup
Use the app to check the live view from the camera’s final mounted position. Walk through the detection area and confirm that the camera records or sends an alert according to your settings. Check the saved clip or event history to confirm it contains usable footage, not just a notification. Test after dark if night coverage matters.
Close the app and check whether notifications still arrive on your phone. If the camera has a siren, spotlight, or two-way audio, test those features only in a suitable setting and at a reasonable volume. Ask another household member to check the shared access they were granted. Make any adjustments to the camera angle, motion zones, or sensitivity, then repeat the walk-through.
Tip: Run a test from both near and far parts of the monitored area. A camera can show live video but still miss motion or fail to save clips.
Check: Live view works, a test event appears in the event history, alerts arrive as configured, and footage shows the intended area clearly.
Common Mistakes to Avoid
- Mounting the camera before checking its image and Wi-Fi signal. — Test the live view and connection at the intended location before drilling or attaching permanent hardware.
- Aiming the camera through glass or directly at a bright light. — Place it outside the window or adjust the angle to limit infrared reflections, glare, and washed-out footage.
- Setting motion sensitivity too high or leaving zones too broad. — Begin with a focused motion zone and moderate sensitivity, then adjust after reviewing actual alerts.
- Sharing one password or giving every user full account access. — Use unique account credentials, enable multi-factor authentication, and share access through the app’s individual-user controls.
Troubleshooting
Problem: The camera will not connect to Wi-Fi.
Solution: Confirm that the Wi-Fi password is correct and check the camera’s supported bands. Move the camera or router closer during setup, temporarily disable a VPN on the phone, and retry through the official app. If the router combines 2.4 GHz and 5 GHz under one name, check the camera maker’s guidance before changing network settings.
Problem: The live view is slow, blurry, or keeps disconnecting.
Solution: Move the camera closer to the router or improve coverage with a compatible access point. Check whether other devices are using most of the connection, then restart the camera and router if the maker permits it. Confirm that the app and camera firmware are current.
Problem: Motion alerts arrive too often or do not arrive.
Solution: For too many alerts, narrow the motion zone and lower sensitivity, then test again. For missing alerts, check phone notification permissions, the camera’s schedule, quiet hours, detection settings, and whether the app is allowed to run in the background.
Problem: The camera shows live video but no clips appear.
Solution: Check that recording is enabled and that the selected storage method is available. Verify any subscription status, hub connection, or memory-card compatibility and free space. Trigger a test event and confirm whether it appears in the event history.
What Success Looks Like
Your setup is working when every camera appears online in the official app, shows a clear view of its intended area, and records a test event to the storage method you selected. Motion alerts should arrive on the intended phones without repeated false alarms. Household access should be limited to authorized users, account protection should be active, and each camera’s position should respect household privacy and property boundaries.
Next Steps
Check the live view and event history after the first day of use, then adjust camera angles, motion zones, and notification sensitivity based on actual results. Test the cameras monthly and after router, app, or account changes. Replace or recharge batteries before they run low, keep firmware updated, and confirm that clips remain available for the retention period you expect. Remove access for anyone who no longer needs it. If a camera cannot maintain a connection or record reliably after these checks, consult the manufacturer’s support before replacing hardware.
Frequently Asked Questions
Do smart security cameras need Wi-Fi?
Many Wi-Fi cameras need a home network for app access, alerts, and cloud recording. Some systems record locally to a hub or memory card and may offer limited operation without internet, but remote viewing and notifications can stop. Check the model’s requirements before buying or installing it.
Should I install a camera indoors or outdoors?
Choose based on the area you need to monitor and the camera’s rating. Use an outdoor-rated model for exposure to weather, and install it where power and signal remain reliable. Indoor cameras should avoid private spaces and should not be aimed through glass if night vision is needed.
Can I use a smart camera without a subscription?
That depends on the model. Some cameras offer local recording to a card or hub without a paid plan; others limit video history or certain features without a subscription. Check storage, clip retention, and alert features before setup.
Why does my camera require 2.4 GHz Wi-Fi?
Some cameras support only 2.4 GHz because it is common in smart-home devices and can cover longer distances than 5 GHz. Follow the maker’s pairing instructions. Do not change router security or split network names unless the camera documentation recommends it.
How can I reduce false motion alerts?
Limit the motion zone to the area that matters, lower sensitivity a little, and avoid pointing at moving branches, busy roads, or reflective surfaces. Test one change at a time and review alerts over several days so you do not miss relevant activity.
Halloween Picks
halloween
As an affiliate, we earn on qualifying purchases.