
To create chic small space organization with labeling hacks, combine colorful, cohesive labels with creative design elements. Use DIY techniques like handwritten tags or printed labels with stylish fonts, and incorporate color coding for quick recognition. Match labels to your decor for a personalized touch and add icons for clarity. Keep labels simple, updated regularly, and consider natural materials for an elegant vibe. Explore these ideas further to elevate your space effortlessly.
Key Takeaways
- Use color-coded labels with matching backgrounds or borders to clearly differentiate categories in small spaces.
- Create personalized labels with DIY techniques, incorporating custom fonts, icons, and handwritten touches for charm and clarity.
- Combine vibrant colors with sleek, minimalist designs to add style while maintaining easy item recognition.
- Regularly update labels to reflect changing needs, ensuring continued organization and visual appeal.
- Incorporate natural materials like wood or recycled paper for eco-friendly, stylish labels that enhance small space decor.
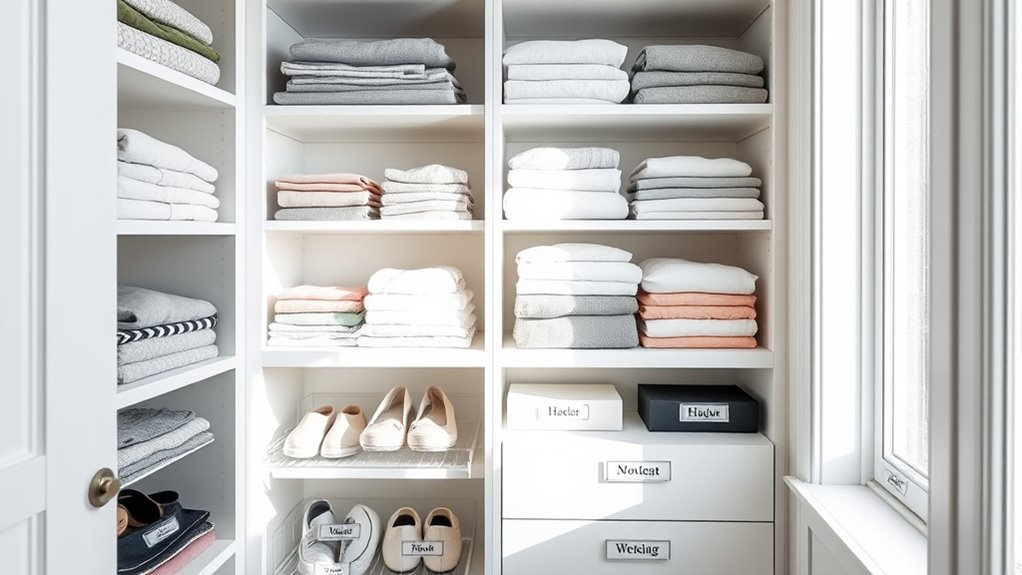
Have you ever struggled to keep things organized or found yourself wasting time searching for the right item? If so, you’re not alone. Small spaces can quickly become cluttered without a clear system in place. That’s where clever labeling hacks come in, making your space more functional and visually appealing. One of the easiest and most effective methods is using color coding. By assigning different colors to specific categories—like blue for cleaning supplies, green for kitchen tools, or yellow for craft materials—you create an instant visual guide. Color coding helps you find what you need faster and keeps everything in its designated spot. Plus, it adds a splash of vibrancy to your space, making organization feel less like a chore and more like a design statement.
Color coding your space quickly boosts organization and adds vibrant style.
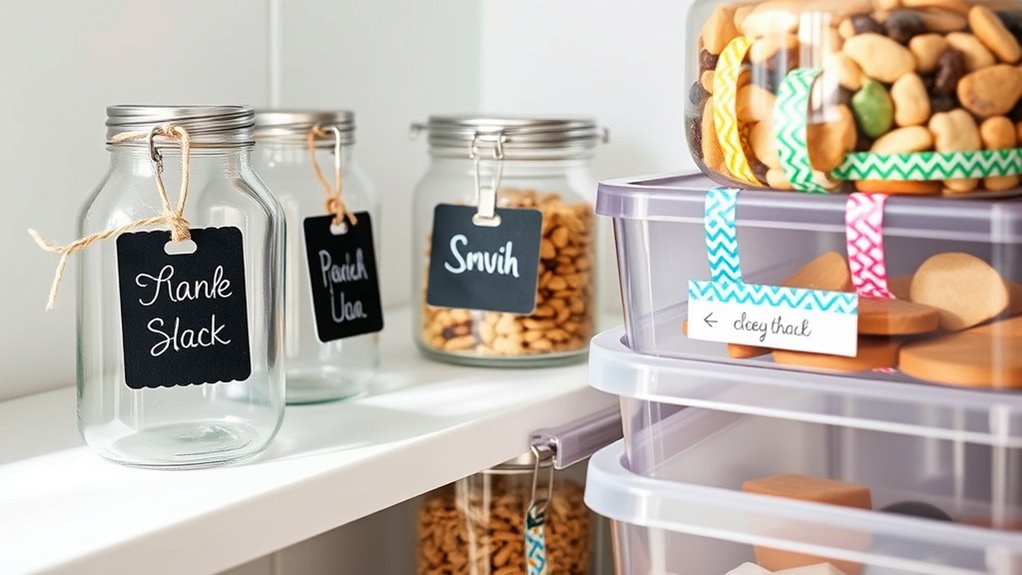
Another simple yet impactful trick is creating DIY labels. You don’t need fancy equipment—just some adhesive paper, markers, or printable labels. Crafting your own labels allows you to customize sizes, fonts, and styles to match your decor. For example, handwritten labels on small jars give a charming, personal touch, while printed labels on baskets or bins look neat and professional. DIY labels also make it easy to update or change categories as your needs evolve, so your organization system stays flexible. Whether you’re labeling spice jars, storage boxes, or files, homemade labels offer a budget-friendly way to streamline your space without sacrificing style.
Combine these two strategies by designing labels with color-coded backgrounds or borders. This way, your labels aren’t just informative—they’re also eye-catching. For instance, a red label with white text can mark emergency supplies, while a pastel-colored label might designate seasonal décor or clothing. Using color and custom labels together transforms a cluttered corner into a thoughtfully curated area, making everything easy to identify at a glance. It’s a simple hack that saves you time and frustration, especially in tight quarters.
Plus, creating your own DIY labels and color coding schemes gives you control over your organization system. You can match them to your color palette, personalize fonts, or add icons for extra clarity. It’s a fun way to express your style even in small spaces. The key is consistency—stick to your chosen colors and labeling style so that everything looks cohesive and intentional. With just a few supplies and some creativity, you’ll turn your small space into a well-organized haven that’s both functional and chic. Incorporating natural materials and sustainable practices can also enhance your organization efforts, making your space both stylish and eco-friendly. Once you start implementing these hacks, you’ll wonder how you ever managed without them.
Frequently Asked Questions
How Do I Choose the Best Label Materials for Sensitive Items?
To choose the best label materials for sensitive items, focus on durability and gentle adhesive sensitivity. Opt for labels made from waterproof or tear-resistant materials like vinyl or polyester, which hold up well over time. Look for labels with low-tack adhesives that won’t damage delicate surfaces or leave residue. Test a small area first to guarantee the adhesive sensitivity works without harming your items, and select a material that balances durability with gentle adhesion.
What Are Eco-Friendly Labeling Options for Small Spaces?
You can opt for eco-friendly labeling options like biodegradable adhesives and labels printed with plant-based inks. These choices reduce plastic waste and chemical impact, making your small space more sustainable. Use biodegradable adhesive labels directly on containers or surfaces, and select labels printed with plant-based inks for a chic, eco-conscious look. These options help you maintain organization while caring for the environment.
How Can I Prevent Labels From Peeling Over Time?
To prevent labels from peeling over time, focus on improving label durability and adhesive strength. You can achieve this by choosing labels with a strong, weatherproof adhesive designed for long-lasting hold. Applying labels on clean, dry surfaces also boosts adhesion. Additionally, sealing labels with a clear, waterproof spray or laminate can protect them from moisture and wear, ensuring your labels stay in place and look chic longer.
Are There Labeling Techniques Suitable for Children’s Rooms?
You can make labeling fun and durable for children’s rooms by using colorful stickers and textured labels. Kids love vibrant, playful designs, so incorporate stickers with fun shapes or characters. For added durability, choose textured labels made from waterproof materials that stick securely without peeling. This approach keeps labels engaging and resilient, ensuring they stay in place as kids explore and grow, while also making organization easier and more appealing for young children.
How Do I Organize Labels for Seasonal or Infrequently Used Items?
You should implement label rotation and seasonal color coding to organize your seasonal or infrequently used items. Rotate labels as seasons change, making it clear what’s in storage. Use different colors for each season—like red for summer or blue for winter—so you can easily identify items at a glance. This system keeps your space tidy, guarantees quick access, and maintains a chic, organized look year-round.
Conclusion
Now that you’ve discovered these labeling hacks, your small space will transform faster than you can say “organized paradise.” Embrace the creativity, get those labels looking chic, and watch clutter vanish into thin air. With just a few clever ideas, your home will look so stylishly tidy, guests will think you hired a professional organizer—when really, it’s all you! So go ahead, label away, and enjoy the magic of a beautifully organized space.